Organize Like a Pro: Build a DIY Fishing Rod Rack for Your Garage
Table of Contents
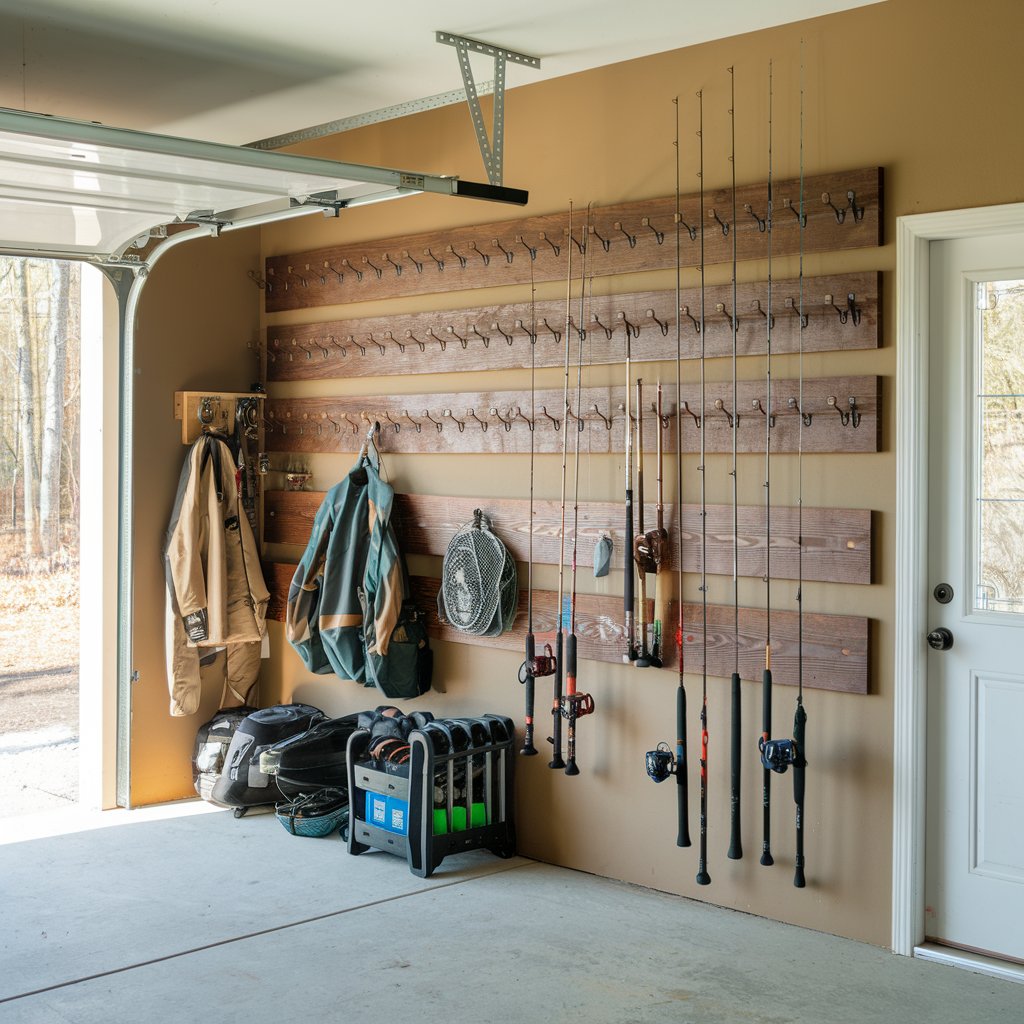
Ever tripped over a fishing rod in your garage, only to unleash a domino effect that sends your tackle box flying like a startled school of minnows? We’ve all been there. Fishing rods leaning haphazardly against walls, hooks snagging on lawn chairs, and reels collecting dust—it’s a mess that even Marie Kondo would weep over. But what if you could transform that chaos into a sleek, organized display worthy of a Field & Stream cover shoot? Enter the DIY fishing rod rack: a simple, budget-friendly project that’ll turn your garage into a tackle-tidy paradise.
Organizing gear isn’t just about aesthetics—it’s about respect for your tools and time. While store-bought racks can cost more than a new reel, building your own from scrap wood or PVC is cheap, customizable, and oddly therapeutic. Unlike the patience-testing art of fly tying or the muscle-straining grind of deep-sea fishing, this project is a quick win for anglers of all stripes. Whether you’re a weekend warrior with two rods or a collector with a dozen, a DIY rack means no more frantic pre-dawn searches for your favorite ultralight. Grab your drill and let’s turn that garage junkyard into a rod-ready sanctuary!
What is “Organize Like a Pro: Build a DIY Fishing Rod Rack for Your Garage”?
Let’s decode the title: “Organize Like a Pro” means no more spaghetti rods. “DIY” means your craftsmanship (even if your last woodworking project was a lopsided birdhouse). And “Fishing Rod Rack”? That’s code for your gear’s forever home.
Why build a rack? Because store-bought options are like fast-food fries—generic and overpriced. Picture this: You repurpose an old pallet, add some foam-lined hooks, and suddenly your rods hang like museum pieces. It’s like giving your gear a first-class ticket to organization town. And as every angler knows, “A bad day of fishing is still better than a good day at work.” But with a tidy garage, even your “bad days” start stress-free. Ready to banish the clutter? Let’s nail this project!
Why You’ll Love This DIY Fishing Rod Rack
- Clarity in Chaos
Spot your favorite rod instantly—no more playing “Guess Which One’s the Spinning Reel.” - Save $$$ for New Gear
Store racks cost 100+.Ours?Under100+.Ours?Under30 using scrap wood, PVC, or even old pool noodles. - Custom Fit, Pro Vibes
Adjust spacing for fly rods, surf rods, or kid-sized poles. Add LED lights for a boat-show vibe.
Compared to the icy misery of winterizing a boat (which feels like defusing a bomb), this project is a sunny-day stroll. Love this? Check out our guide on DIY Fishing Bait Coolers. Now, let’s get building!
How to Master Your DIY Fishing Rod Rack
Quick Overview
In 2–3 hours, craft a sturdy, space-saving rack using basic tools and creativity. Perfect for garage warriors!
Key Gear You’ll Need
- Wood or PVC: 1×4 pine boards or 1.5-inch PVC pipes (for a modern look).
- J-Hooks or Pool Noodles: Soft hooks protect rod finishes; pool noodles slit lengthwise work too.
- Screws & Brackets: Heavy-duty screws (2.5-inch) and L-brackets for wall mounting.
- Extras: Sandpaper, wood stain/paint, foam padding (for cushioning).
[Insert image: Wood, hooks, screws, and tools laid out on a workbench]
Step-by-Step Instructions
- Measure & Cut (30 mins):
- For wood racks: Cut two 4-foot boards (vertical posts) and three 2-foot boards (horizontal shelves).
- For PVC: Cut four 2-foot pipes and two 4-foot pipes.
- Assemble the Frame (1 hour):
- Wood: Attach horizontal shelves between vertical posts using screws (12-inch spacing between shelves).
- PVC: Build a ladder-like frame using elbow joints. Secure with PVC glue.
- Add Rod Holders (45 mins):
- Screw J-hooks into the horizontal boards at 6-inch intervals.
- For PVC, slit pool noodles and slide them over the pipes to cushion rods.
- Mount & Style (30 mins):
- Secure the rack to wall studs with L-brackets.
- Stain or paint the wood for a polished look. Add labels for rod types if desired.
What to Pair With Your Rod Rack
- DIY Tackle Wall: Mount pegboard above the rack for hooks, pliers, and line.
- Gear Bench: Build a small seating area for tackle prep.
- Fish Art: Hang vintage lures or a “Gone Fishing” sign for ambiance.
Top Tips for Success
- Measure Twice, Drill Once: Account for reel overhang—leave 8–10 inches between rods.
- Go Vertical: Use ceiling space for surf rods with pulley systems.
- Kid-Proof It: Place lower hooks for small anglers’ gear.
Storing and Maintaining Your Gear
Dust rods and reels monthly with a microfiber cloth. Check hooks for rust and replace as needed. Loosen reel drags before long-term storage. Inspect rack screws annually to ensure stability.
Final Cast
There you have it—a DIY fishing rod rack that’s as functional as it is satisfying. Now step into your garage, bask in the glory of your organized arsenal, and prepare for fishing trips that start with ease, not chaos. Remember: A tidy angler is a happy angler. Tight lines and even tighter screws! 🛠️🎣
P.S. Show off your rack with #RodRackMasterpiece—we’ll feature the most creative designs!